
Allergy-friendly Banana-ish Muffins
Gluten-free, dairy-free, vegan muffins which use cornmeal and bananas for consistency moreso than flavor.
Servings: 6 large muffins
Calories: 625kcal
Equipment
- Muffin Pan - jumbo (makes 6) or regular (makes 12)
Ingredients
Dry Mix Ingredients
- 270 g Gluten-Free 1-to-1 Baking Flour
- 170 g cornmeal (fine ground recommended)
- 1½ Tbsp Baking Powder
- 1 tsp Baking Soda
- 1 tsp Salt (fine ground table salt)
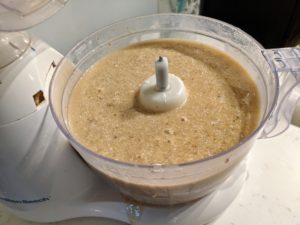
Wet Mix (food processor) Ingredients
- 2 cups Non-dairy milk of choice
- 180 g Brown sugar
- 4 Bananas (as ripe as possible)
- ½ cup Vegan butter (1 stick - softened if possible)
- 1½ tsp Vanilla Extract
- 2 Tbsp Corn Starch
- 2 Tbsp Flax Seeds (ground)
Optional
- Oil Spray (for greasing the muffin pan)
- Sugar (large grain, such as Demerara or Turbinado - for topping)
- ½ Cup Chocolate Chips (allergy-friendly)
- 2 tsp Cinnamon (this may negatively impact the rise)
Instructions
BEFORE REFRIGERATION
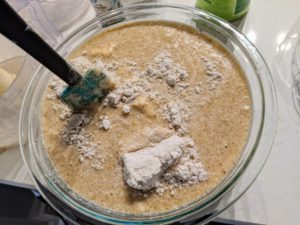
- Combine "Dry Mix" ingredients (flour, cornmeal, baking powder, baking soda, salt, cinnamon) in a medium-to-large mixing bowl.
- In a food processor, combine "Wet Mix" ingredients (milk, sugar, butter, bananas, corn starch, flax seeds, vanilla)
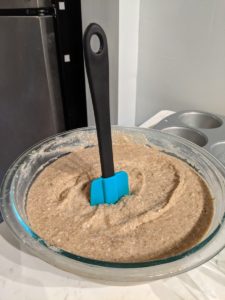
- Fold the wet mix from the food processor into the dry mix until combined.
- Cover the mixing bowl and refrigerate for at least 1 hour, up to overnight
AFTER REFRIGERATION (overnight if possible)
- Pre-heat oven to 500° F
- Lightly oil the muffin pan (a spray works great here)
- Scoop/pour batter into muffin cups as evenly as possible
- OPTIONAL: Sprinkle sugar crystals on top
- Bake at 500° F for about 6-10 minutes (6 minutes for smaller muffins, 10 for larger)
- Without opening the oven door, reduce temperature to 400° F and continue to bake for 20 minutes (small) or 30 minutes (large).NOTE: The 20 minutes starts immediately, not after the temperature has decreased all the way to 400. This could vary depending on how long it takes your oven to cool down.
- At this point you can do the toothpick test to check for done-ness (stick a toothpick in the middle of a muffin, pull it out, and see if there's any gooey batter on it). Or, usually, you can just see if any of the tops look like they're about to burn. The tops are going to brown way before the bottoms do, so you can afford to wait for that visual cue. (This might vary depending on how much sugar you use on top, but surprisingly, the sugar doesn't usually burn. Probably because there's plenty of moisture trapped in there.)
- When done, use oven mitts to take the muffin pan out of the oven, and as soon as you can, turn them out onto a cooling rack. I recommend leaving them upside down until cooled, because the tops are usually much more rigid than the bottoms, which tend to sink into the wires of the cooling rack.
Notes
- Regarding the bowl size, keep in mind that you will want to be able to cover and refrigerate it.
- If you don’t have a food processor, you can probably still get by with just mashing/whisking everything up really well. The main goal is to incorporate all of the vegan butter, which can be tricky, since it’s not ideal to melt it. (Honestly I've simply never tried it without a food processor, because it just seems like the easiest way.)
- Typically a muffin recipe will say to mix the wet ingredients into the dry ingredients “until JUST combined”, but over-mixing probably won’t be an issue here, since there are no eggs and we are also going to let this set in the fridge for a long time.
- The batter should be pretty thick and able to hold its shape a little bit, even before refrigeration. After refrigeration, you should more or less be able to stand up a spatula in it.
- To fill the "cups" of the muffin pan: I would start by filling them all about halfway, then continue to distribute until the batter is used up. A pitcher is helpful for this, but not required. Ideally, the refrigerated batter will be just runny enough to be pourable, but thick enough that you can “pile” it just a wee bit higher than the cup.
- Calorie count assumes a jumbo-sized muffin, but without chocolate chips or sugar. (Yeah, yeah, I know. Look, calorie-counting muffins is probably a futile endeavor in the long run, but I just want to give you a somewhat realistic baseline estimate here. If you're trying to be healthy, you should really be eating vegetables, not these.)